How to Use AdPlexity for Affiliate Marketing Research (2026)

Here is how to use AdPlexity for affiliate marketing research in 8 steps. The process takes about 20–30 minutes once you know the workflow. I have used this exact method to find winning campaign angles on Taboola and push networks before launching my own campaigns.
What You Need Before Starting
Before you can research campaigns on AdPlexity, you need:
AdPlexity Modules at a Glance
| Module | What It Tracks | Price |
|---|---|---|
| Native | 20M+ native ads across 9 networks (Taboola, Outbrain, MGID, Revcontent, and more) in 60+ countries | $249/month |
| Desktop | Display, banner, and pop ads across desktop traffic sources in 100+ countries | $199/month |
| Mobile | Pop-unders, redirects, and mobile-specific display creatives across 90+ countries | $199/month |
| Push | 3M+ push notification ads across 10 networks and 90+ countries | $149/month |
| Adult | Adult display and native ad creatives across major adult traffic networks | $199/month |
| YouTube | Video ad campaigns (pre-roll, in-stream) across 60+ countries | $149/month |
| Social | Facebook, Instagram, and TikTok ad creatives via adplexity.io | $99/month |
Apply coupon code BLOGECLIPSE_N at checkout for 30% OFF any plan, every billing cycle.
Step-by-Step Guide: Using AdPlexity for Affiliate Research
Step 1: Log In and Choose Your Module
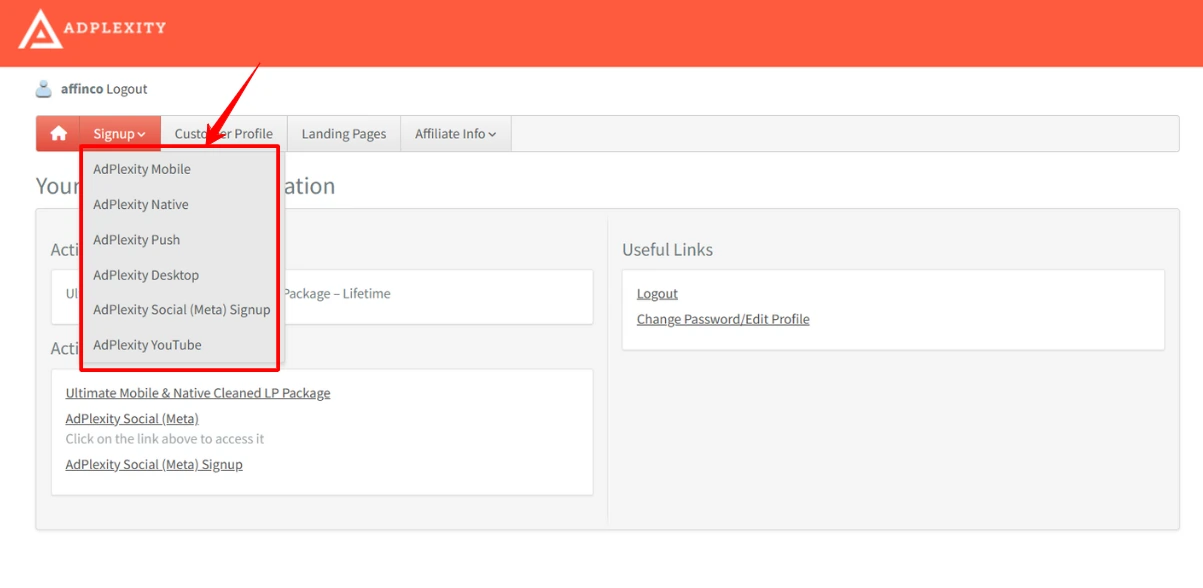
After logging into your AdPlexity account, select the module that matches the ad format you run. If you buy traffic on Taboola or Outbrain, choose Native. If you run push notification campaigns, choose Push. The AdPlexity Native module is the most popular among affiliate marketers.
Each module has its own database and filters. The interface layout is the same across modules, so once you learn one, you can navigate the others.
Step 2: Set Your GEO — Choose the Country You Are Targeting
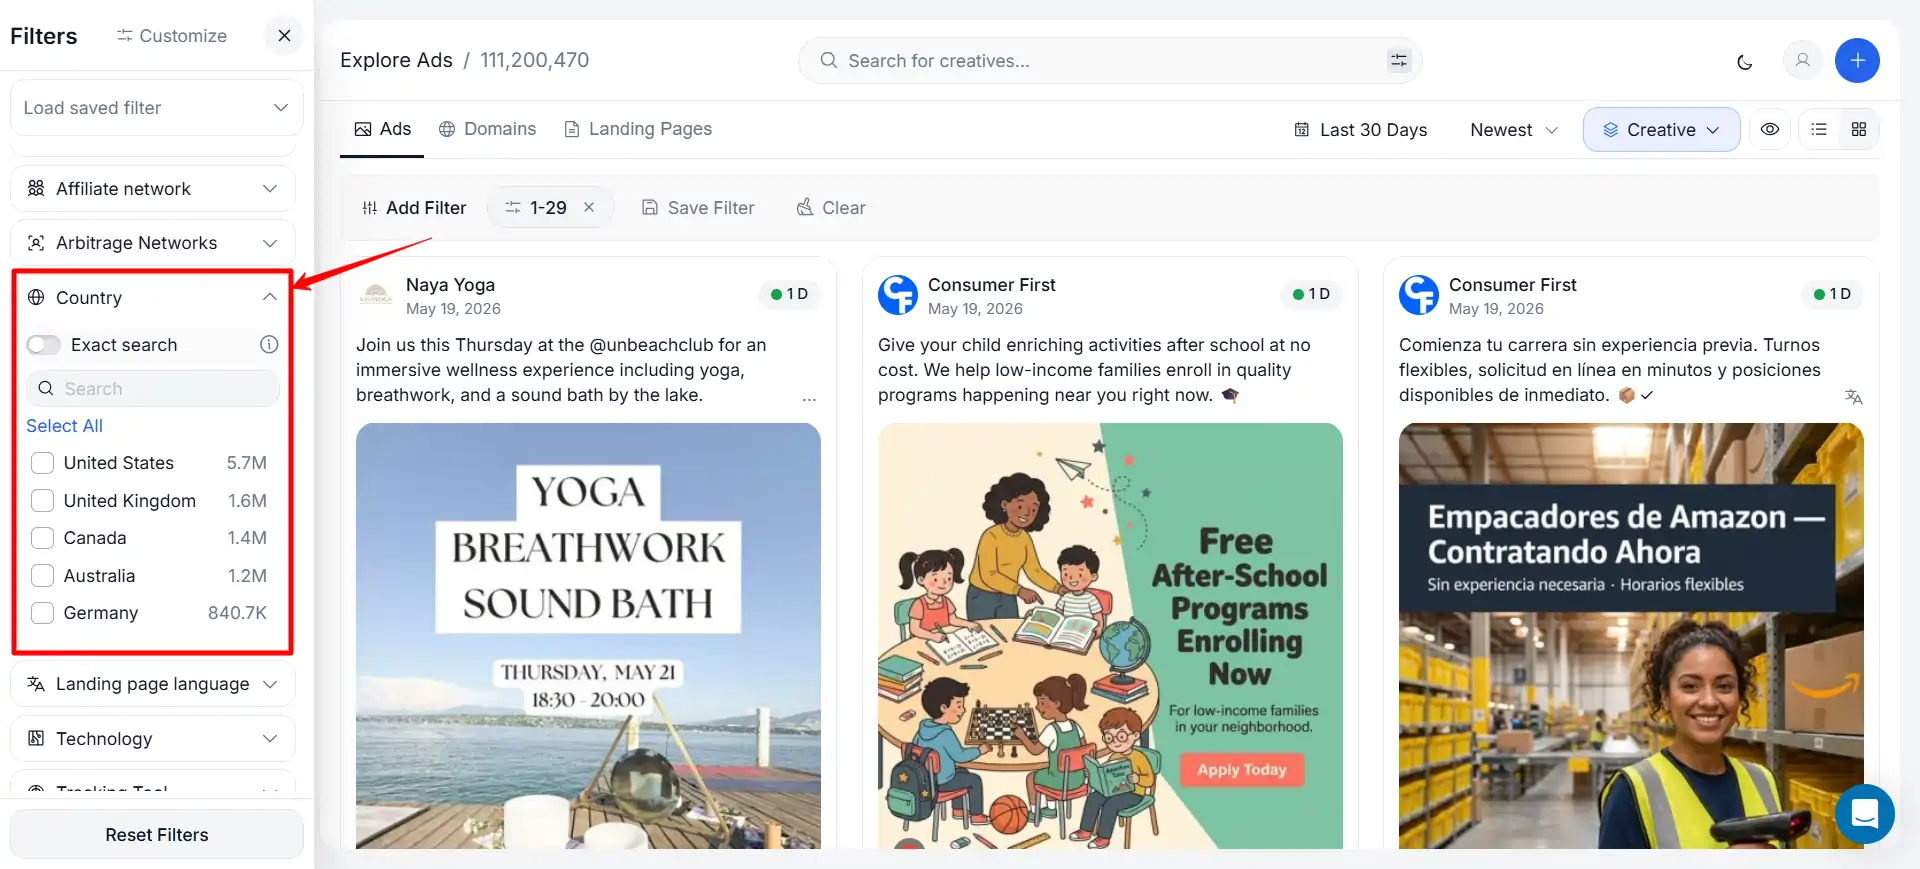
Select the country where you run (or plan to run) campaigns. This filters the database to ads targeting that specific market. Start with the country where you have the most experience — if you have been buying traffic in the United States, filter to US campaigns first.
You can select multiple countries to compare how the same angles are adapted across markets.
Step 3: Apply Device and OS Filters
Narrow results to the device type your campaigns target. If you buy mobile traffic exclusively, filter to mobile — this removes desktop campaigns that use different creative formats and landing page layouts. Adding an OS filter (Android or iOS) further narrows the results to your exact traffic profile.
Step 4: Filter by Date — Sort by “Last 7 Days” to Find Active Campaigns
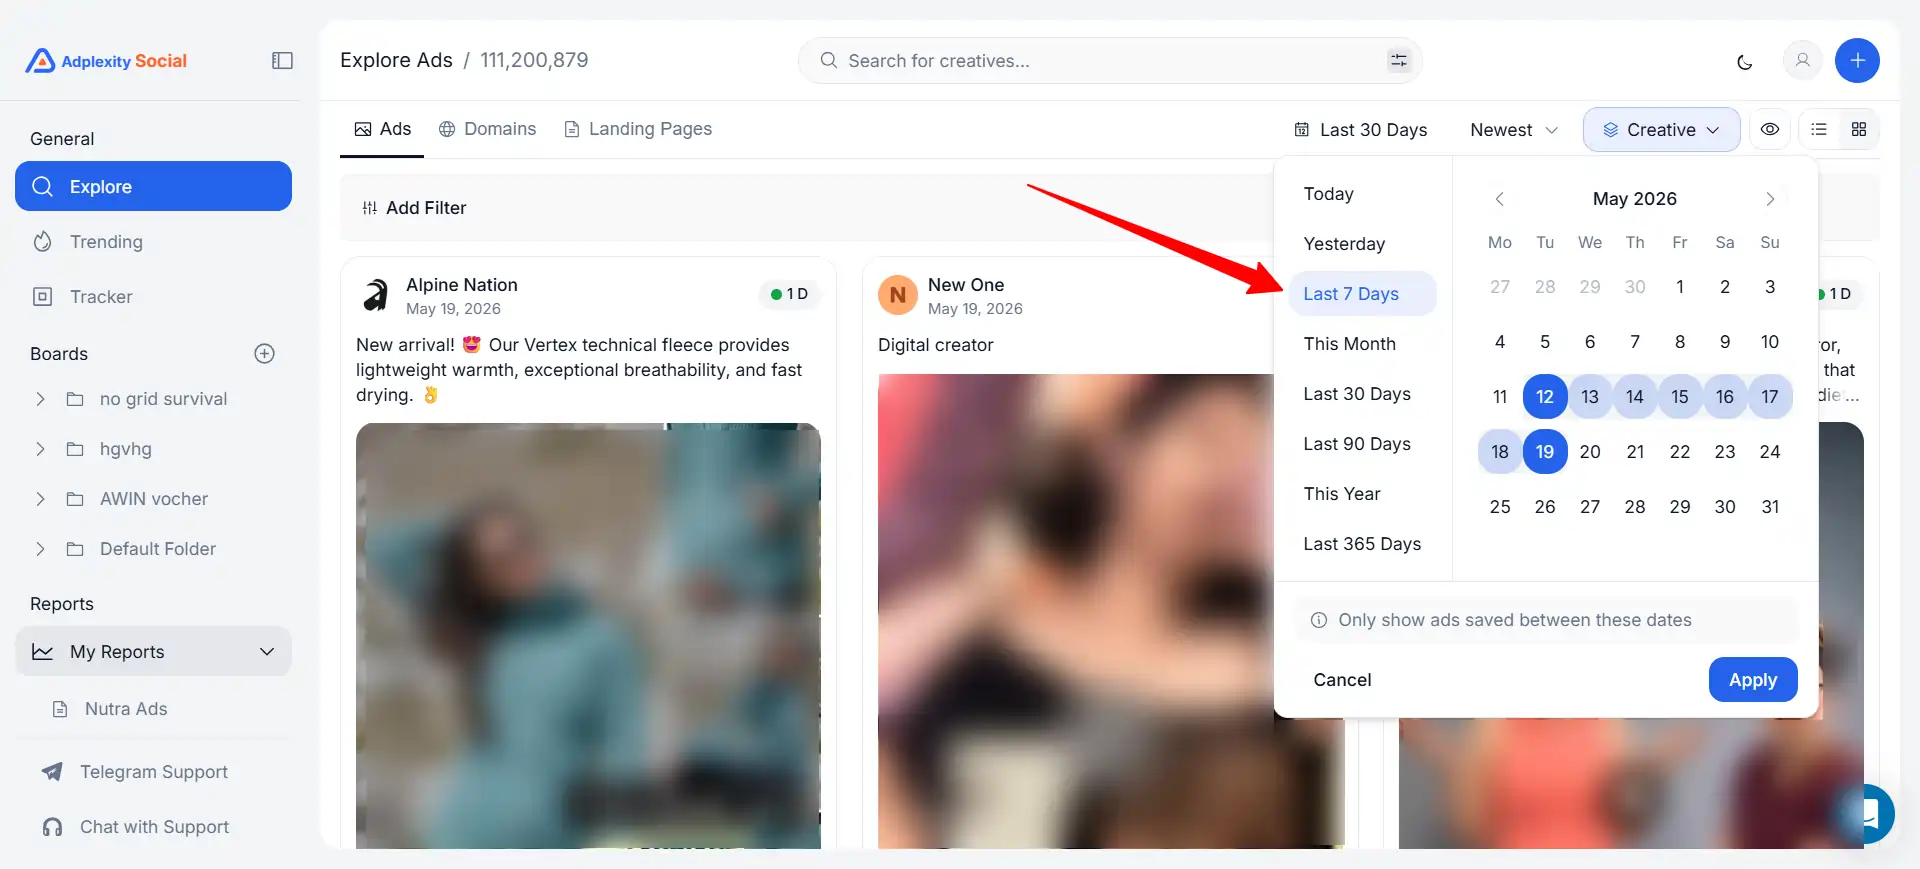
Set the date range to “Last 7 days” to see campaigns that are currently running — not archived campaigns from six months ago. Then sort by “Running Since” (longest running first). Campaigns that have been active for 30+ days are your strongest signal for profitability. Nobody keeps spending money on native or push ads that do not convert.
Step 5: Search by Keyword or Browse Trending Ads
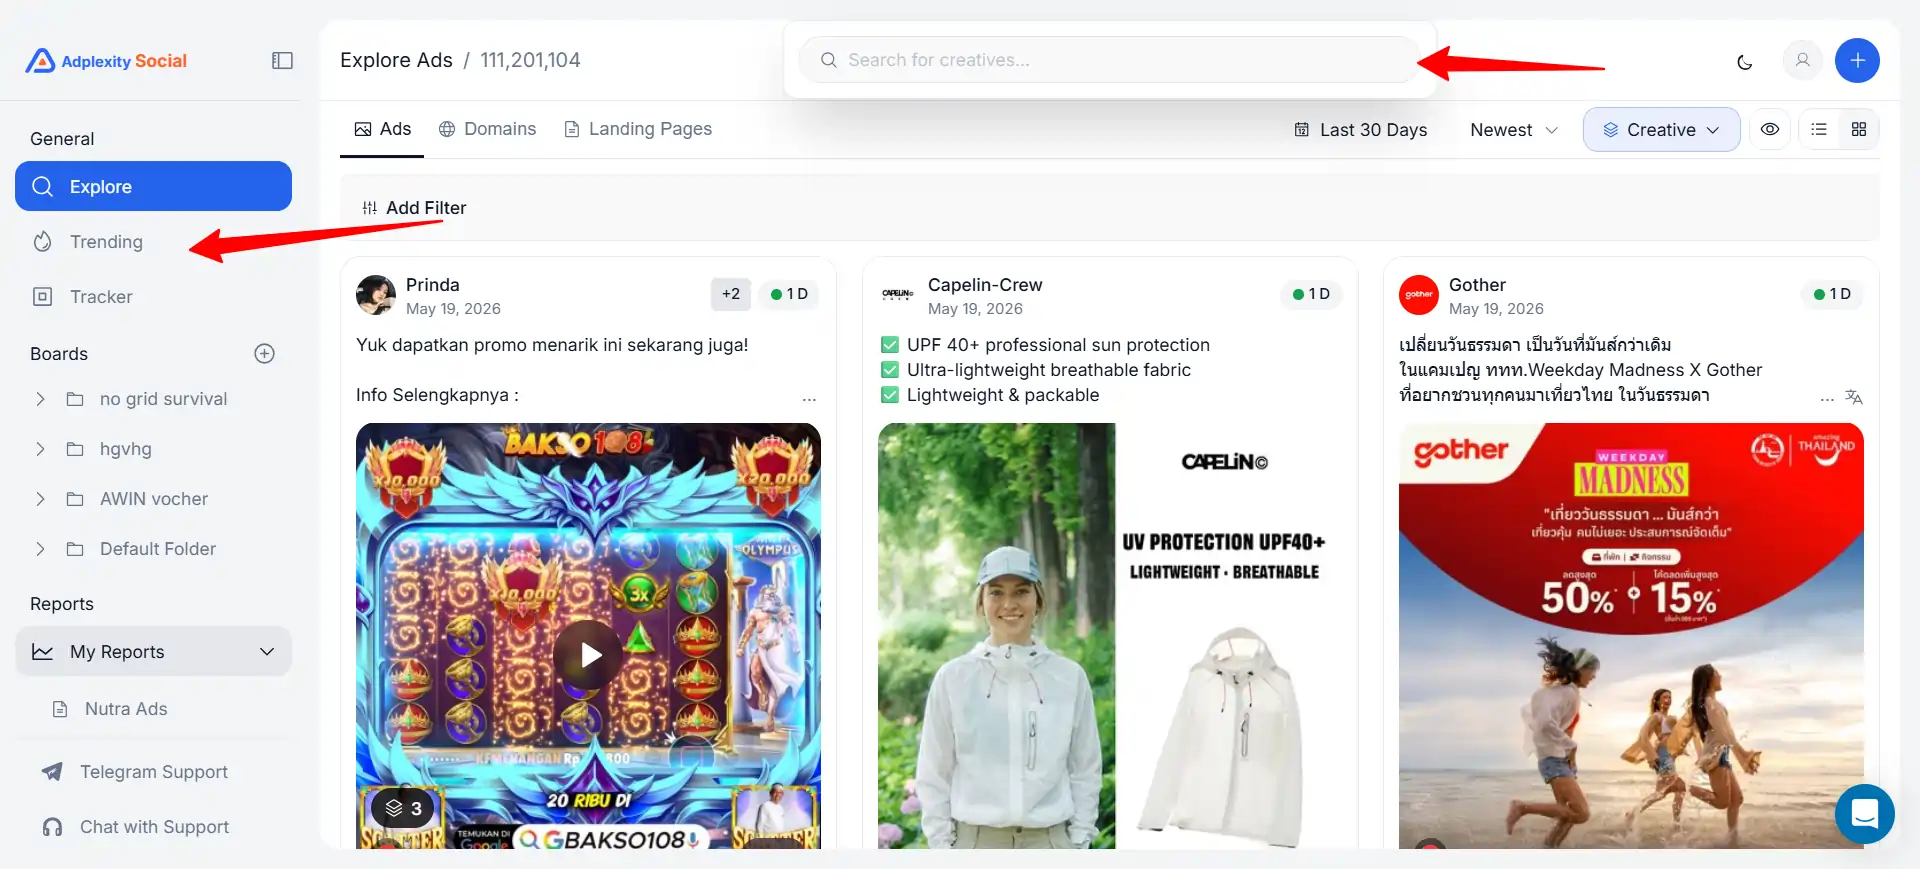
You have two approaches:
- Keyword search: Type a keyword related to your niche (e.g., “weight loss,” “VPN,” “insurance,” “gaming”) to find campaigns promoting those topics. This is the fastest way to find competitors in your specific vertical.
- Browse trending: Use the trending or popular filters to see which campaigns are getting the most impressions across all categories. This is useful for identifying new niches or vertical trends you have not considered.
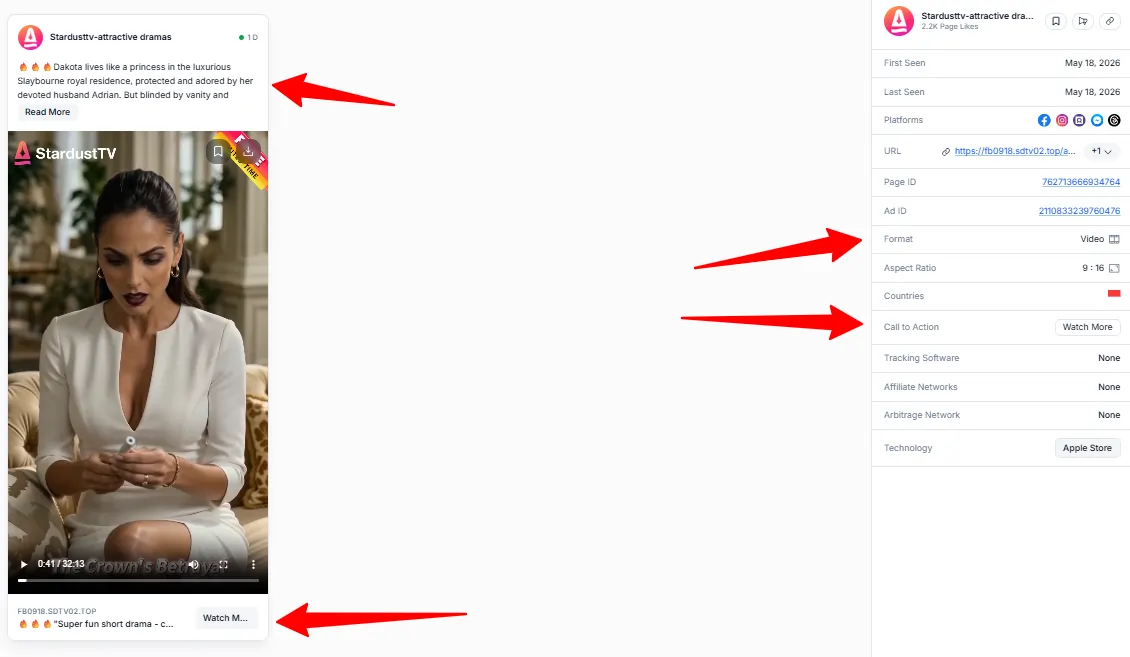
Step 6: Open a Winning Campaign — Analyze the Creative Angle, Headline, and Thumbnail
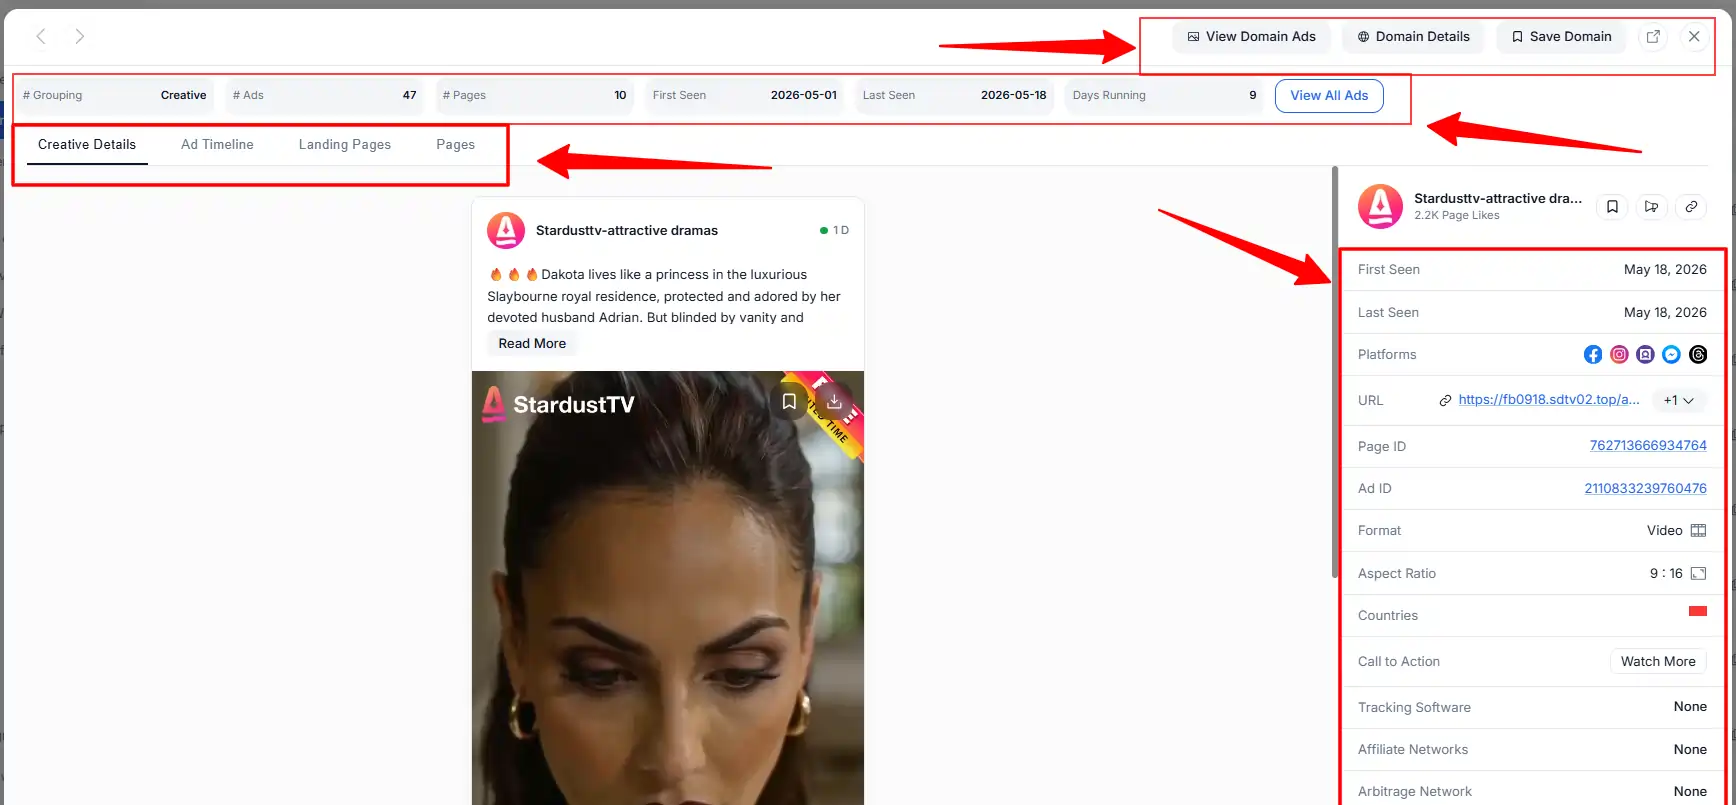
Click on a campaign to open the full details. Study four things:
- The headline — what emotional trigger or curiosity hook does it use?
- The creative image — what visual style works for this niche?
- The running duration — how long has this exact creative been active?
- The affiliate network — which CPA network or offer is behind the campaign?
Write down the patterns you see across multiple winning campaigns in the same niche. The individual campaign matters less than the recurring patterns across successful campaigns.
Step 7: Click Through to the Landing Page — Identify the Offer Type, Layout, and CTA
Every campaign links to a landing page. AdPlexity shows you the destination URL and a preview of the page. Study the landing page structure:
This is where the real intelligence lives. The ad gets the click; the landing page makes the sale. Understanding why winning landing pages convert helps you build better pages for your own campaigns.
Step 8: Download Creative and Landing Page Assets for Your Own Testing
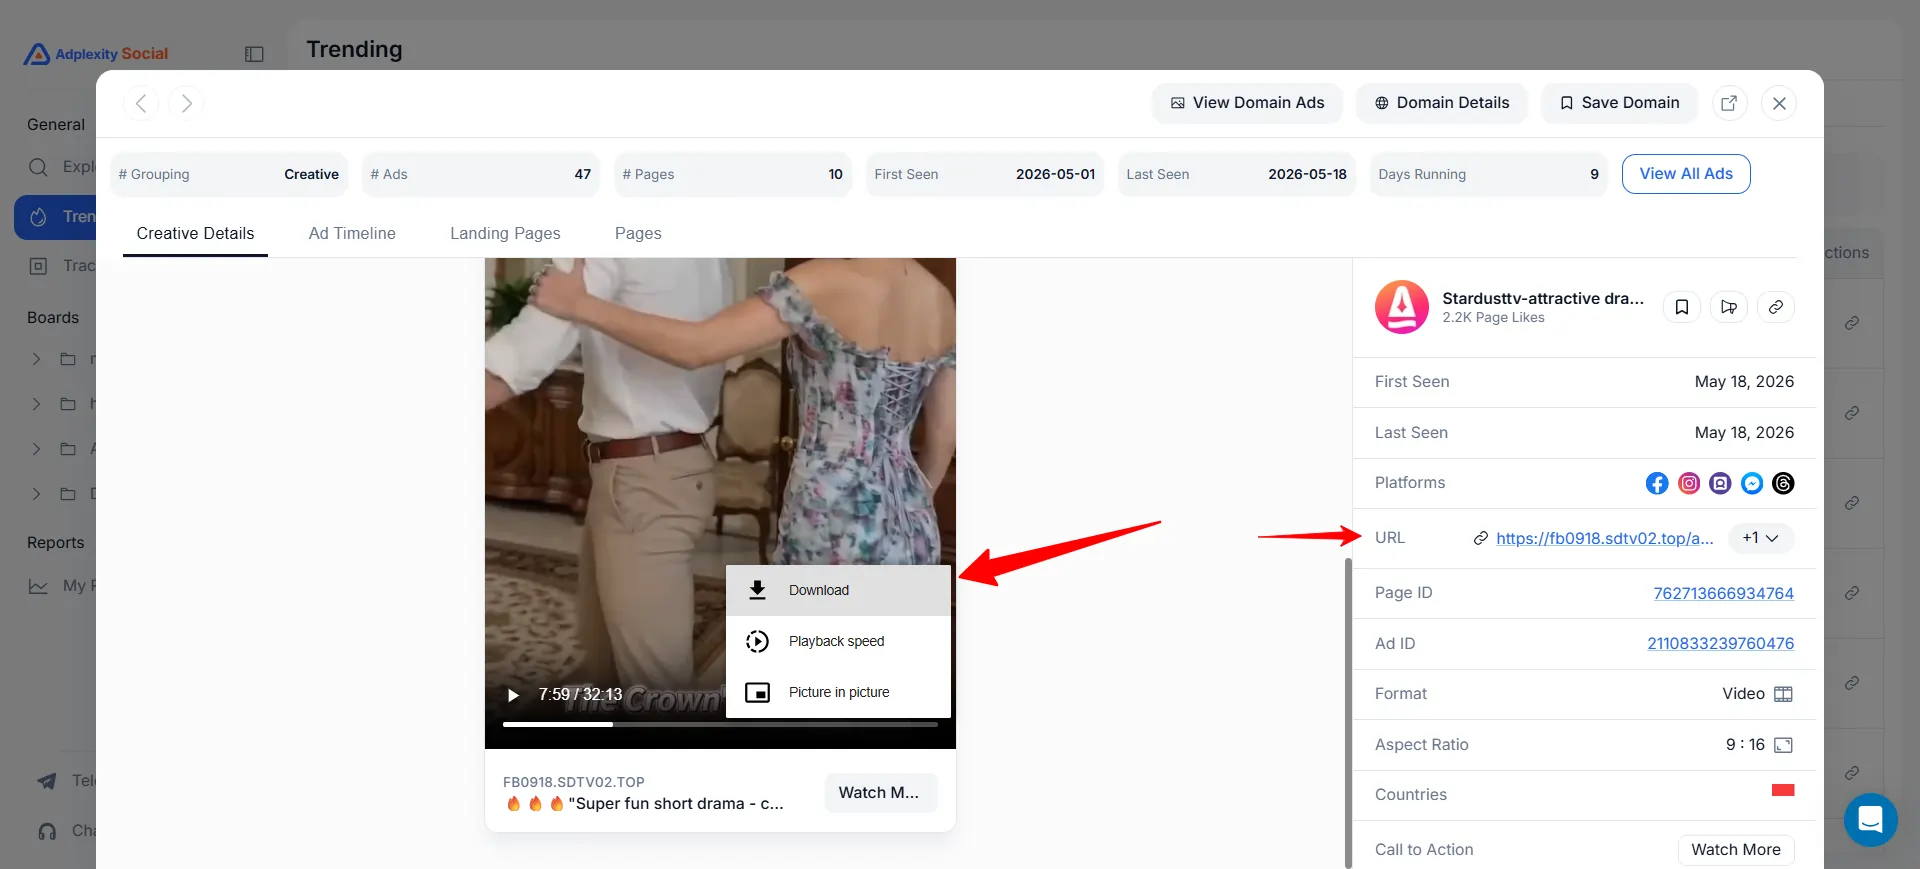
Click the download button to save the landing page as a complete HTML file and the ad creative as an image file. You now have a real-world example of what is working in your niche.
Important: do not copy these pages word-for-word. Use them as research — study the structure, angle, and layout, then create your own original version. Direct copying risks trademark issues, network compliance violations, and getting your campaigns banned.
Common Mistakes to Avoid When Using AdPlexity
Tips to Get Better Research Results
How Much Does AdPlexity Cost for This?
AdPlexity plans range from $99/month (Social) to $249/month (Native). Apply Coupon codes at checkout for 30% OFF for life.
See our full AdPlexity pricing page for every plan, cost, and coupon-applied price.
30% Exclusive Discount
AdPlexity Products
Lifetime Discount with Code
FAQs Related to AdPlexity for Affiliate Marketing Research
How long does it take to learn AdPlexity?
The basic workflow (search, filter, analyze) takes 15–20 minutes to learn. Getting efficient at identifying winning patterns across campaigns takes 2–3 weeks of regular use. The interface is functional but not intuitive on first login.
Can beginners use AdPlexity?
Beginners can use the platform, but they will not get full value from it. AdPlexity shows you what competitors are running — it does not teach you how to set up, launch, or optimize ad campaigns. You need existing paid traffic knowledge to act on the intelligence.
How often should I use AdPlexity for research?
At minimum 3 times per week. The ad market changes daily — new campaigns launch, old ones die. Weekly research misses trends that daily or bi-daily research catches.
Do I need all 7 AdPlexity modules?
No. Start with the one module that matches your primary ad format. Most affiliates only need 1–2 modules. Subscribing to all 7 would cost over $1,000/month — unnecessary unless you run campaigns across every ad format.
What is the best AdPlexity module for affiliate marketing?
Native is the most popular among performance affiliates because native advertising (Taboola, Outbrain) is one of the highest-volume traffic sources for CPA campaigns. Push is the second most popular for affiliates running push notification traffic.
Final Thoughts
Using AdPlexity for affiliate marketing research is straightforward once you build the habit: filter → sort → analyze → download → adapt. The 8-step process above works across every AdPlexity module. Start with one format, master the workflow, and expand to other modules if your campaigns require it.


